Week 2 at Command Shift


This is the end of Week 2 of the Command Shift boot camp and this was all things HTML for me. As always, if you're looking for more information on this course please visit https://www.commandshift.co or feel free to message me through my Twitter https://twitter.com/DaveDoesCoding
HTML, the language of the web
Starting this week was the HTML course. HTML stands for Hyper Text Mark Up language and it is the bones of any website and page that we use. It was first created in 1991 and has had multiple different iterations, and we are currently on HTML5.
The DOM
The first subject we touched on was the Document Object Model (The DOM) It is a language-independent model made up of objects that make up the structure of a document. It is tree-shape based which means its elements are organised into what we call nodes and these nodes are HTML elements and text. All of these elements have types, attributes and children. Learning how best to manipulate and work with the DOM is something we will touch on in a later module.
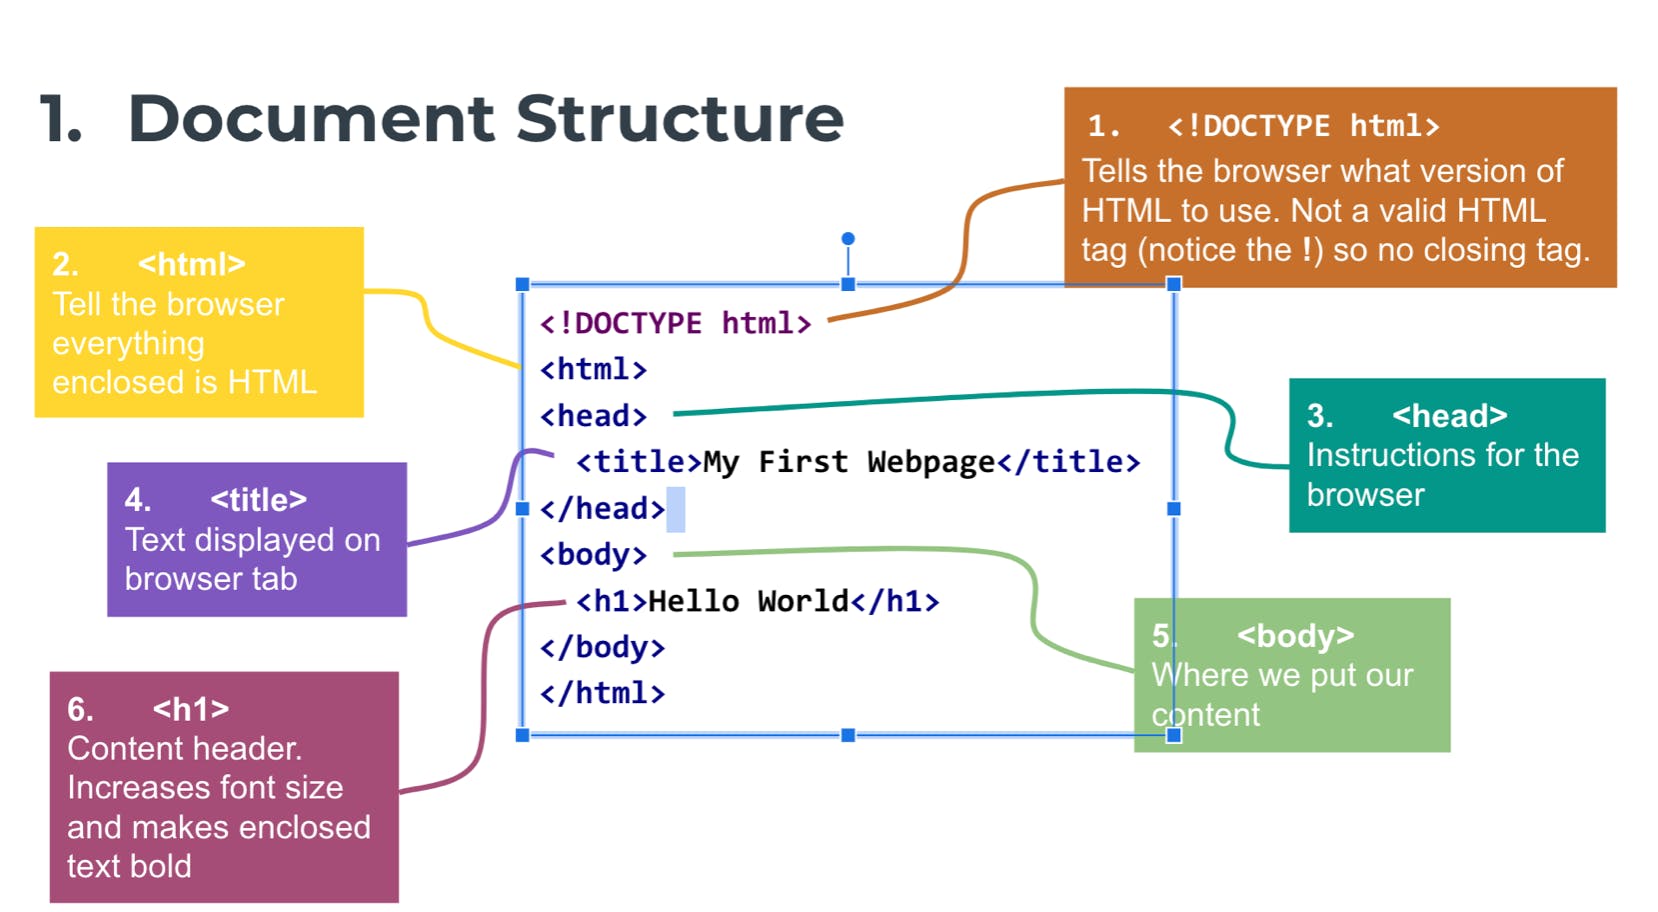
Below I have included an image of what a standard webpage structure looks like.
Tags in HTML
The tags in HTML are how we tell the document what we want to represent. They come in many different forms such as Headings(<h>) paragraphs(<p>) lists(<li>) and so on. A lot of tags require an opening and closing tag (<p> </p>) this allows the document to know when to stop showing content as part of a specific element. Some tags, such as an image tag, are self-closing and require no closing tag.
There are a lot of different tags within HTML and I'm not going to go through each one as I'd like to keep this blog short.
I'll list the main ones we've touched on within the course:
H tag: Heading tags come in H1, H2, H3 etc and each one are used to represent different areas of content on a page. It's considered best practice to not have multiple H1 elements within a page.
P tag: Paragraph tags (<p>) are your paragraphs for your content.
Nav tag: A tag to set a navigation bar for your web page. This is usually placed near the top of the page.
img tag: Used for inserting images into a document.
div tag: This tag is used to help divide up content on the page, and is very helpful when styling separate elements for CSS.
em tag: The emphasis tag helps screen readers change the meaning of a sentence. Similar to the Italic(<i>) tag.
Follow this link for a 100 different HTML elements https://developer.mozilla.org/en-US/docs/Web/HTML/Element
Image embedding in HTML
We went through how to embed an image within HTML. The main way we do this is via the img tag. An example of this is <img src="/images/me.png" alt="John Doe Photo"> with this example we can see we have the tag, a source(a path to locate the image) and an alt tag(this alt text shows when the image can not load properly) You can set the source of an image as a web page, however in larger projects you would use an image folder for them.
At the end of week 2
I wanted to keep this blog brief and touch on a few parts of what we touched on throughout the week of HTML learning. At this point, our project was to build our portfolio and use the CLI to help create files and folders. We were also prompted to constantly use GIT to push our changes to our GitHub profiles. I like the constant prompting to do this as it instils habits and muscle memory for those parts we'll use all the time in our coding careers. I already feel very comfortable uploading to my GitHub a lot.
Overall I am enjoying it a lot and the support from fellow students and tutors is great to have. Week 3 is CSS and customising our Portfolios!